How Manual Pad Printing Works
Manual pad printing follows a simple three-step cycle:
-
Inking the Plate
Ink is applied to the etched plate surface. A doctor blade then wipes the surface, leaving ink only in the etched design area. -
Ink Pickup by the Pad
A silicone pad (mounted on a stamp-holder) presses down onto the inked etched design. The ink adheres to the pad surface. -
Transfer to the Substrate
The operator positions the pad over the object and presses it onto the surface. The ink image is transferred to the product.
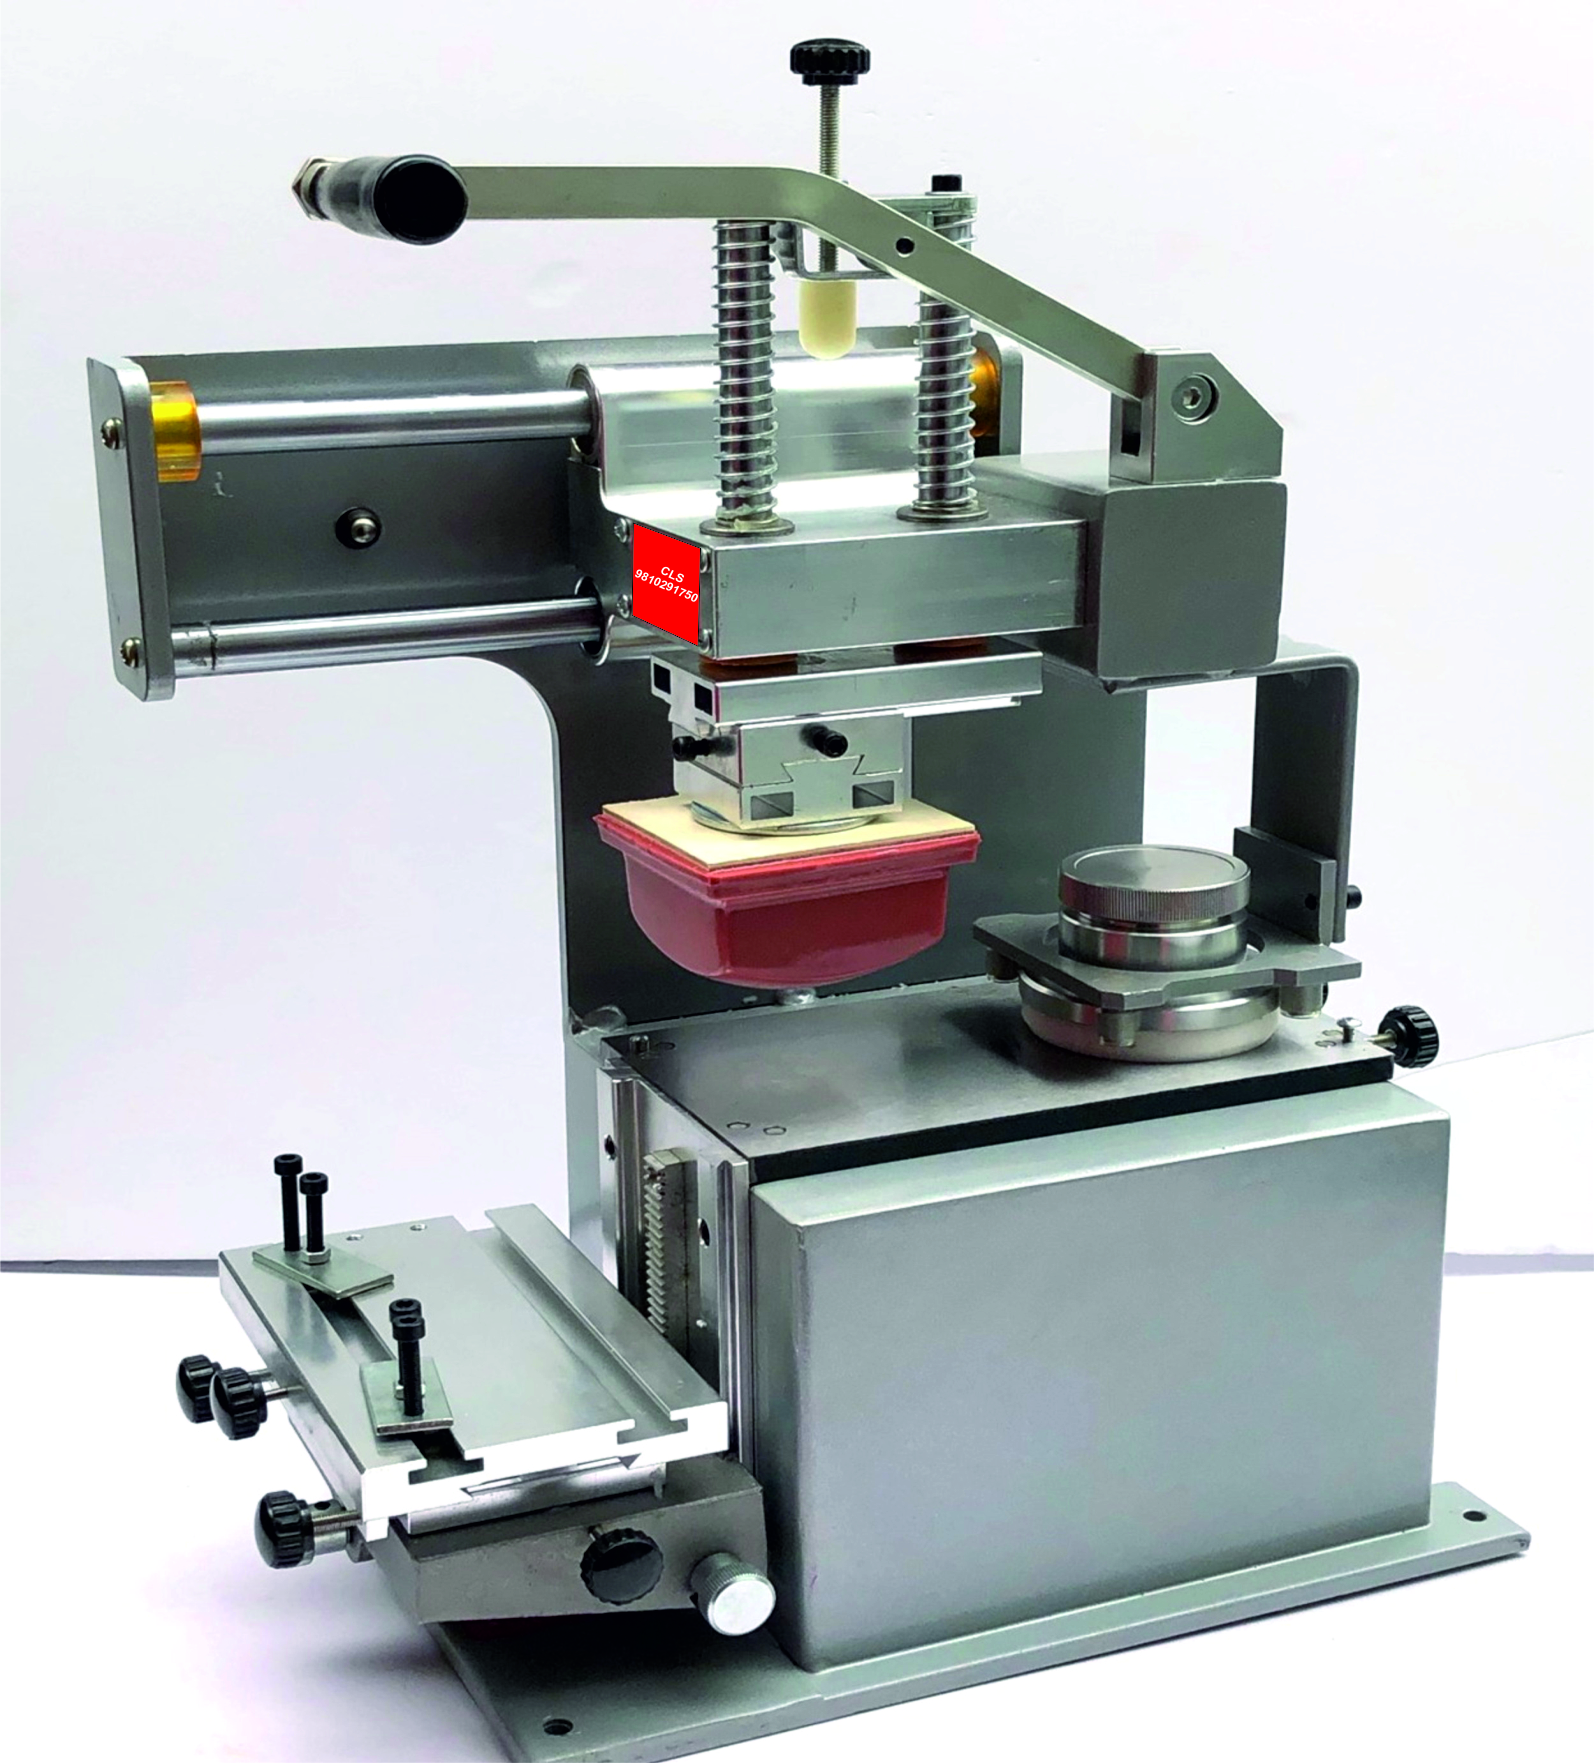
Key Components of Manual Pad Printing
1. Printing Plate
The etched plate holds the graphic design. When ink fills the etched areas, the pad picks up this ink for transfer.
-
Photopolymer plates: Cost-effective and easy to produce
-
Steel plates: Durable and ideal for longer runs
The plate’s quality determines the resolution and clarity of the printed image.
2. Silicone Pad
The silicone rubber pad picks up and transfers ink.
-
Shapes: Round, oval, square, custom
-
Durometer (Hardness): Soft, medium, or hard
-
Soft pads: Great for curved or textured surfaces
-
Hard pads: Sharp detail on flat surfaces
-
The pad’s flexibility lets it conform to uneven or contoured parts.
3. Pad Printing Ink
Specifically formulated for adhesion and durability on the target material.
-
Types: Solvent-based, 2-component (2K), UV-curable
-
Selection: Dependent on material — plastic, metal, glass, ceramic
Good ink ensures wash-fast, scratch-resistant results.
4. Accessories
Manual pad printing often uses:
-
Ink trays and holders
-
Doctor blades
-
Cliché exposure and etching equipment
-
Fixtures and jigs for holding parts
Advantages of Manual Pad Printing
Manual pad printing offers several benefits:
Low Capital Cost
Affordable setup compared to automated pad printing machines.
High Flexibility
Easy to switch designs or adjust prints without tooling changeovers.
Ideal for Small Batches
Perfect for prototypes, custom jobs, short runs, and specialized parts.
Prints on Complex Shapes
Effective on curved, recessed, or contoured surfaces where screen printing may fail.
Limitations to Consider
Manual pad printing also has limitations:
-
Operator skill dependent: Consistency varies with experience
-
Lower speed: Slower than automatic pad printers
-
Less suitable for high volumes: Best used for small runs or niche jobs
Step-by-Step Manual Pad Printing Process
-
Prepare Artwork
Finalize the design and reverse the image for plate etching. -
Make the Plate
Etch the design into photopolymer or steel plate. -
Select Pad
Choose pad shape and hardness based on the surface and design size. -
Mix Ink
Prepare ink with proper viscosity and additives if needed. -
Set Up Work Area
Position the plate, pad, ink tray, and part fixtures. -
Print by Hand
Press pad onto inked plate, then onto the product surface. -
Cure the Ink
Allow air dry, heat-cure, or UV cure depending on ink type.
Best Practices for Consistent Quality
-
Clean surfaces before printing to remove grease or dust
-
Use jigs/fixtures for repeatable alignment
-
Test prints before production runs
-
Choose correct pad durometer for surface geometry
-
Maintain inks and plates for long life and reliable prints
Applications of Manual Pad Printing
Manual pad printing is commonly used for:
✔ Branding and logos on plastics
✔ Controls and icons on electronics
✔ Medical instruments and devices
✔ Promotional items (pens, mugs, keychains)
✔ Automotive interior graphics
✔ Labels on irregular objects
Conclusion
Manual pad printing is a simple, adaptable, and cost-effective printing process for transferring high-quality graphics onto complex shapes and surfaces. Its strength lies in its flexibility, operator control, and ability to print where many other methods cannot.
For small batches, custom jobs, and artisan manufacturing, manual pad printing remains a reliable choice.
Reviews
There are no reviews yet.